
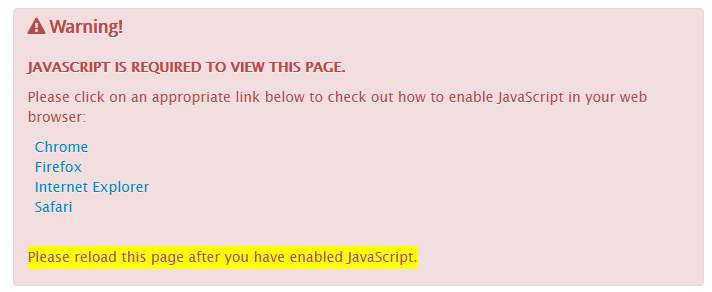
1. Prerequisite
Please ensure that JavaScript is enabled in your web browser. Otherwise, you will see a warning message. Instructions on how to enable JavaScript can be found in the online warning message.
2. Log In
Access the Early Years Evaluation online data entry site using https://app.earlyyearsevaluation.com ![]() .
.
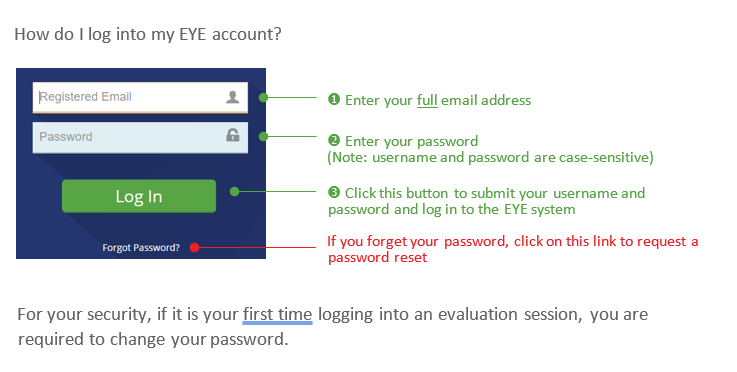
The EYE Support Team will issue you a username and password. After logging in, you can access the wide variety of features that our online data entry site has to offer. These features include the ability to enter scores, edit children’s demographic information, view reports, and access our resources section.
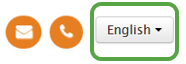
Select your preferred language from the language selector at the top right corner.
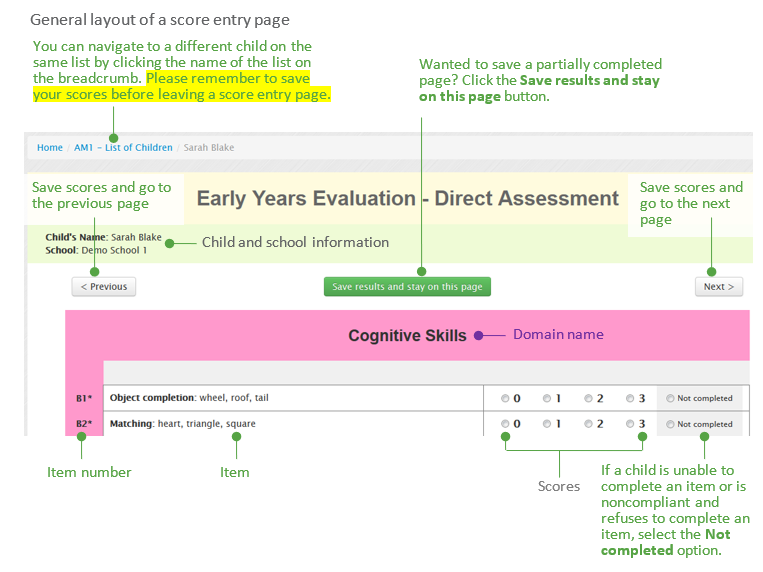
3. General navigation
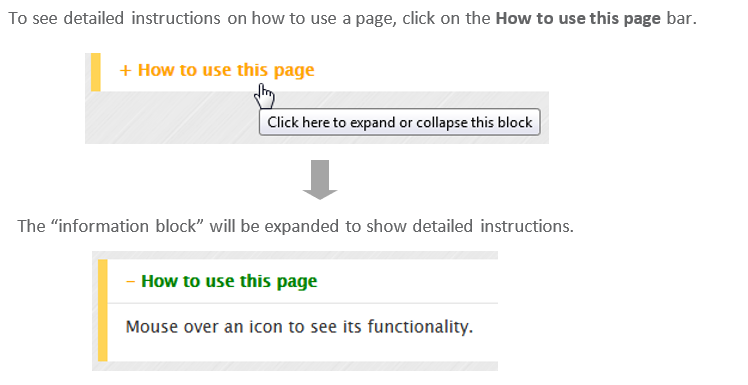
4. Information on how to use a page
5. Edit children on your list
5.1 Select a list to begin
The children assigned to you will be listed on the landing page.
 Please click on the Manage Children Data and Enter Scores
  icon (depicting two children) of a list to proceed to data entry.
You can also see the data entry progress of each list on the landing page.
5.2 Add / Transfer a child to your list
If your jurisdiction did not provide child-level demographic data for upload, please start with adding each child’s demographic information by clicking on the Add/Transfer a Child button. Follow the on-screen instructions to complete the process.
You can always add children to your list before an evaluation session is closed.
5.3 Edit a child’s information
If your jurisdiction provides child-level demographic data for upload, please check the children on the list(s) carefully. Our team works together with the EYE coordinator for your jurisdiction to ensure that all information is correct; however, errors can still occur. Click the pencil icon  to edit a child's information. Make the necessary changes and click Update. All required fields must be complete.
5.4 Exclude a child from score entry
5.4.1 Child is no longer in your class
Put a checkmark in the Moved column to indicate a child has moved away (to another class, school, or district).
5.4.2 Child not assessed
Put a checkmark in the Not Assessed column if a child is exempt from the entire assessment. You will be prompted to indicate a reason in the Note column.
5.5 Sort children list
The names of the children on your class list will be displayed in this order: last name then first name, by default. To change the display order, mouse over one of the following header cells and click on the arrow sign:
- Last Name;
- First Name;
- Date of Birth;
- Date of Evaluation.

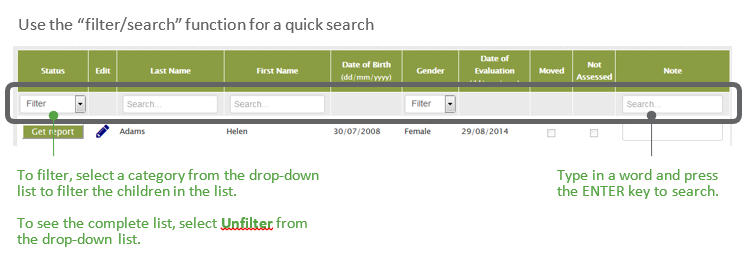
6. Search/filter information on your list
For a quick search of the children in the list, please use the filter/search row below the header row.
7. Navigate between lists of children
To navigate between lists of children, click on the Home link in the breadcrumb at the top.

8. Enter scores
8.1 Begin a score entry session for a child
On your list of children, click the Start button 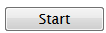 in the first column to begin a score entry session for a child. You will be prompted to complete the following evaluation information on the next screen.
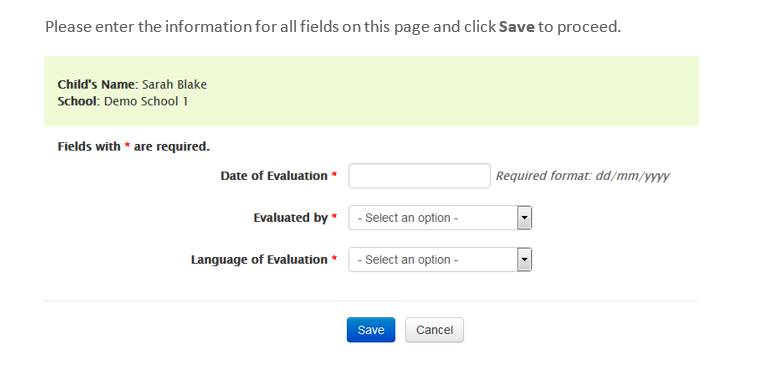
After you have submitted the evaluation information, you will see the first score entry page. Please see below for a detailed description of the layout of a typical score entry page.
8.2 Continue a score entry session already in progress for a child
On your list of children, click the Continue button  in the first column to continue a partially completed score entry.
8.3 Submit scores as final and generate reports
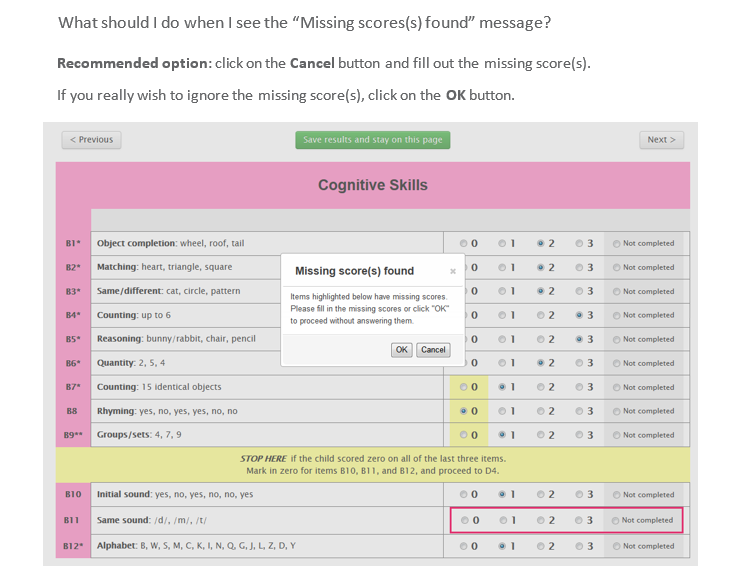
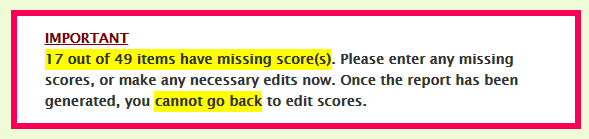
When you have recorded a child’s scores for all items within the EYE-DA, we recommend that you double-check or edit the scores as necessary. Once you choose to generate the report, you will not be able to go back and edit any of the scores entered.
If you have missing scores, the system will prompt you to fill them out before proceeding to report generation.
9. Download child report
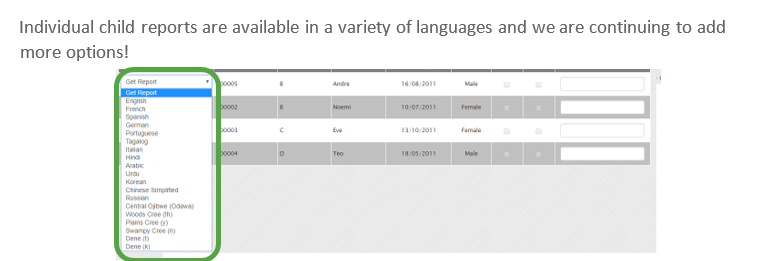
To download the child report in another language, click the Get Report ![]() drop-down button and select the required language.
drop-down button and select the required language.

10. What's New section
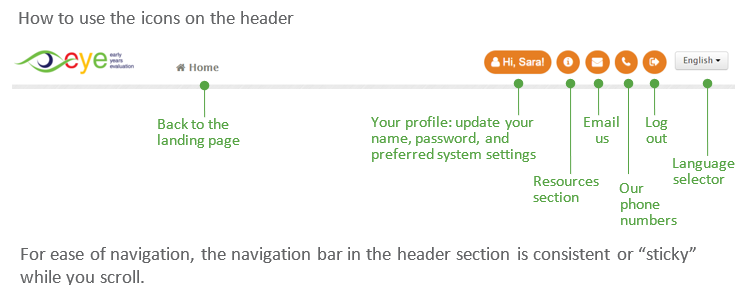
Click on the What's New icon on the sticky navigation bar to learn about our new features and resources.

11. Resources section
Click on the Help & Resources icon on the sticky navigation bar to access the available resources. Follow the on-screen instructions to download the required resources.

12. Contact us
If at any stage you experience difficulties when completing the online data entry, please email us at eye-support@thelearningbar.com. You can also contact us by clicking on the Email Us icon on the sticky navigation bar. Click on the telephone icon for a list of phone numbers.

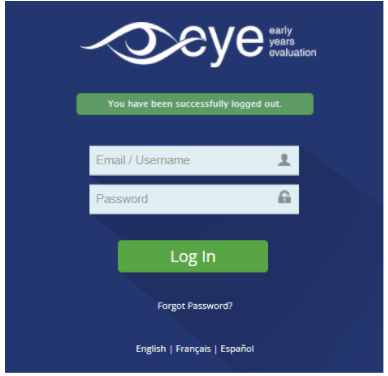
13. Log Out
Click on the Log Out icon on the navigation bar to sign out of the system.

14. How to change the language of the EYE website
Login to your EYE account
From the header section of the website, select the drop-down menu in the top right corner section in the header and select the language of your choice either in (English, French, or Español). The language will automatically be updated in the system.
Disclaimer: All names and results shown on this user guide are fictitious. No real children or user data are disclosed in this document.